Forcepoint Cloud Access Security Broker and AWS Security Hub
Table of contents
License
These contents are licensed under Apache License, Version 2.0. http://www.apache.org/licenses/LICENSE-2.0
TO THE MAXIMUM EXTENT PERMITTED BY APPLICABLE LAW, THE SITE AND ITS CONTENT IS PROVIDED TO YOU ON AN “AS IS,” “AS AVAILABLE” AND “WHERE-IS” BASIS. ALL CONDITIONS, REPRESENTATIONS AND WARRANTIES WITH RESPECT TO THE SITE OR ITS CONTENT, WHETHER EXPRESS, IMPLIED, STATUTORY OR OTHERWISE, INCLUDING ANY IMPLIED WARRANTY OF MERCHANTABILITY, FITNESS FOR A PARTICULAR PURPOSE, OR NON-INFRINGEMENT OF THIRD PARTY RIGHTS, ARE HEREBY DISCLAIMED
Document Revision
| Version | Date | Author | Notes |
|---|---|---|---|
| 0.1 | 19 December 2019 | Rabih Abou Fakher | First draft |
| 0.2 | 19 December 2019 | Mattia Maggioli | Review |
| 0.3 | 23 December 2019 | Rabih Abou Fakher | Update |
| 0.4 | 07 January 2020 | Mattia Maggioli | Review |
| 0.5 | 07 January 2020 | Rabih Abou Fakher | Update |
| 0.6 | 09 January 2020 | Mattia Maggioli | Review |
| 0.7 | 13 January 2020 | Jon Knepher / Audra Simons | Review |
| 0.8 | 18 January 2020 | Rabih Abou Fakher | Update |
| 0.9 | 18 February 2020 | Rabih Abou Fakher | Updated with ARN changes |
| 1.0 | 02 March 2020 | Rabih Abou Fakher | Added docker implementation |
| 1.1 | 23 March 2020 | Neelima Rai | Added troubleshooting chapter |
| 1.2 | 09 April 2020 | Mattia Maggioli | Updated references to ASFF format |
| 1.3 | 01 April 2021 | Rabih Abou Fakher | Update to exclude traditional implementation |
Summary
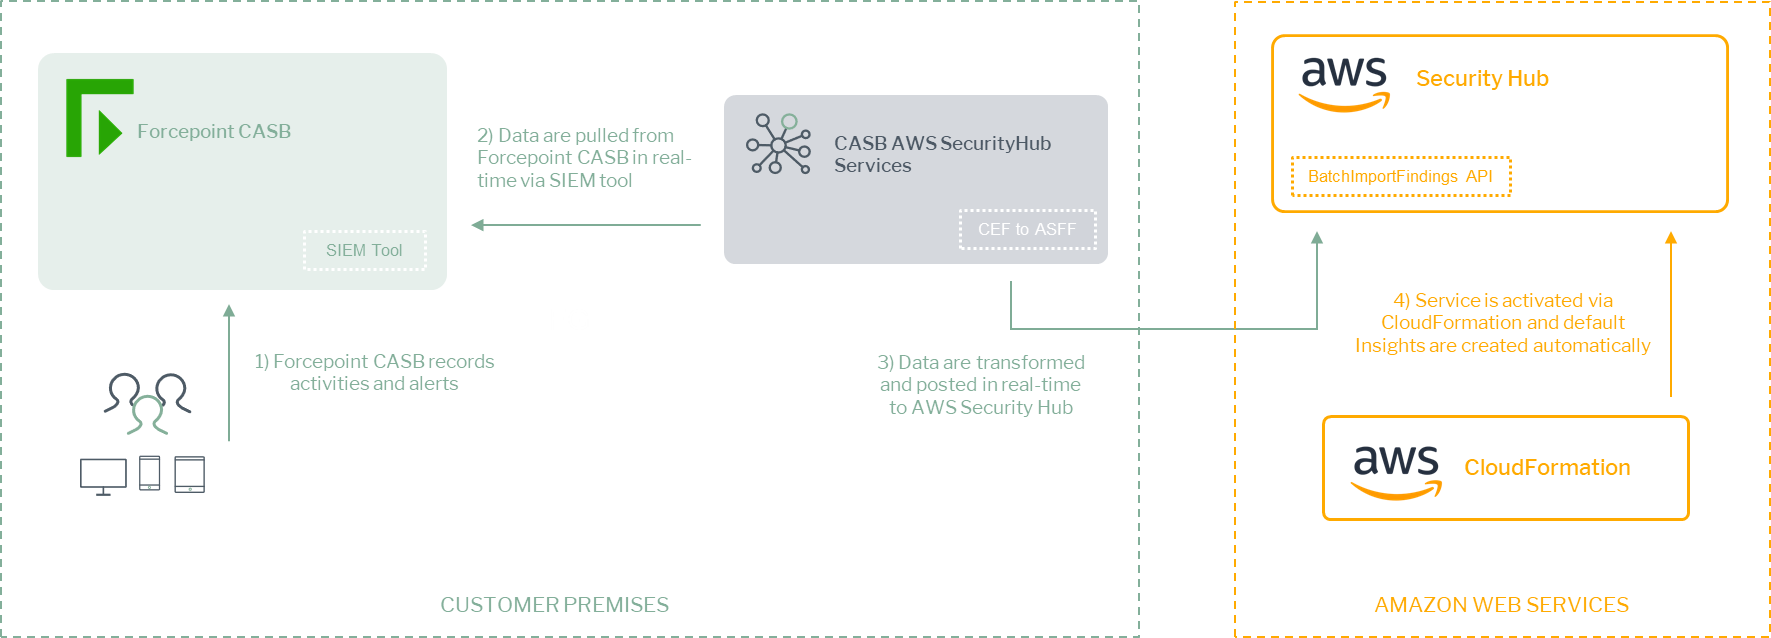
This guide provides step by step instructions to integrate Forcepoint CASB with AWS Security Hub and to export pertinent log data from the CASB SIEM Tool to AWS according to user-configured filters.
The code and instructions provided enable system administrators to automatically:
-
Export log events from Forcepoint CASB SIEM Tool into AWS Security Hub in real-time
-
Ingest logs as “Findings” inside AWS Security Hub and group them into “Insights” using pre-defined examples created programmatically
This interoperability allows centralization of CASB SIEM Tool logs and events and allows for easy curation of data using “Insights” to group “Findings” by a number of fields (e.g. Severity, Action).
A description of the workflow between the components involved in this POC is depicted in the diagram below:
Demo
Source Code
Caveats
These implementation instructions are tested with the following product versions
-
Forcepoint CASB SIEM Tool - Linux version as of 2020-12-10
-
AWS Security Hub – ASFF format as of 2020-04-13
Implementation
- Docker – leverages a docker image where the integration component is already installed with all necessary dependencies: the user only has to edit one configuration file and run the container on an existing docker setup
The docker image for exporting risk level information has been tested working with the following requirements
-
Docker 20.10.5
-
The docker host machine should meet the minimum hardware requirements of 2GB RAM, 50GB free storage, 64bit operating system
Register a user in AWS and retrieve credentials
To submit logs into AWS Security Hub, retrieve and configure AWS settings as described in this process. If AWS Security Hub is not already active, it will be activated automatically by the installation script.
-
Log in to the AWS management console
-
Click on your username in the top right corner and select My Account, look for Account Id at the top of the page and store the ID in a safe location as it is required for configuring the service in the next steps of this guide
-
Navigate to the AWS management console
-
Search for IAM and open it
-
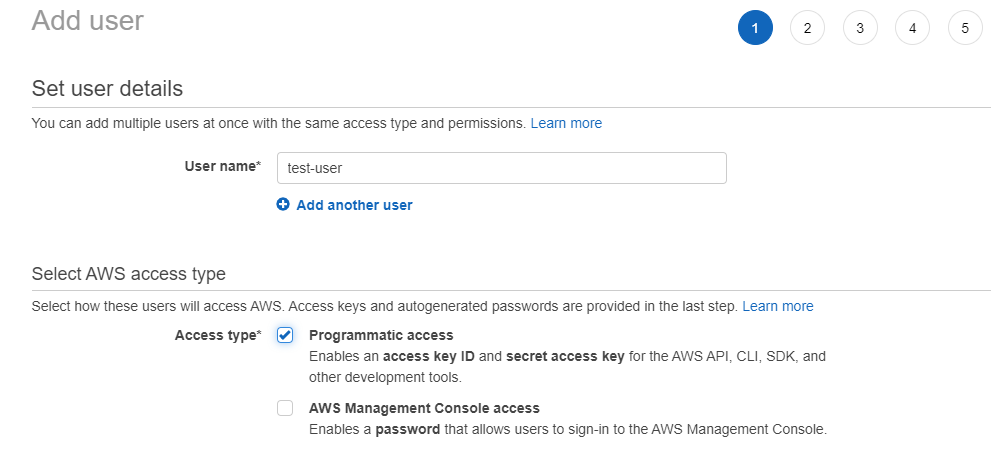
Open the Users section and click Add User in the top left
-
Enter a name for the new user and select Programmatic access in the Access type section
-
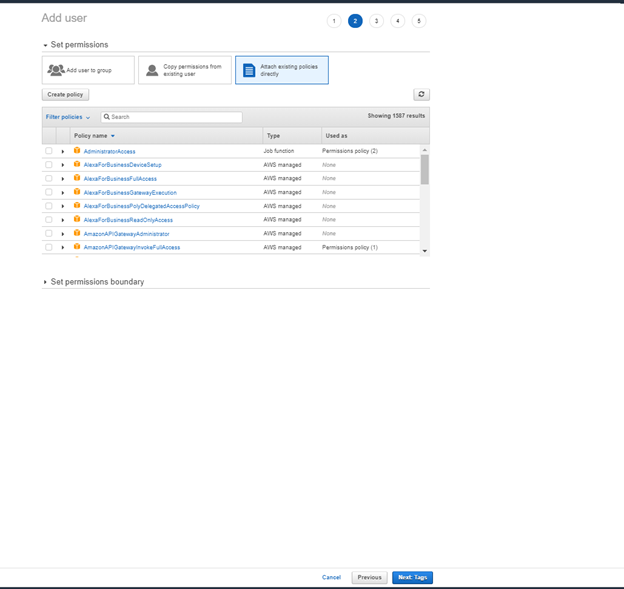
Select Attach existing policies directly and click Create policy
-
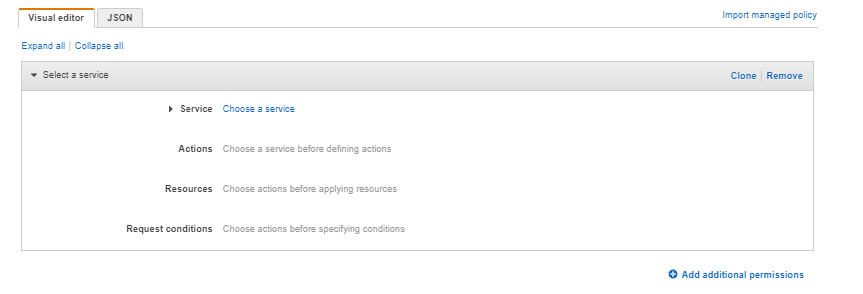
On the new page that opens select Choose a service
-
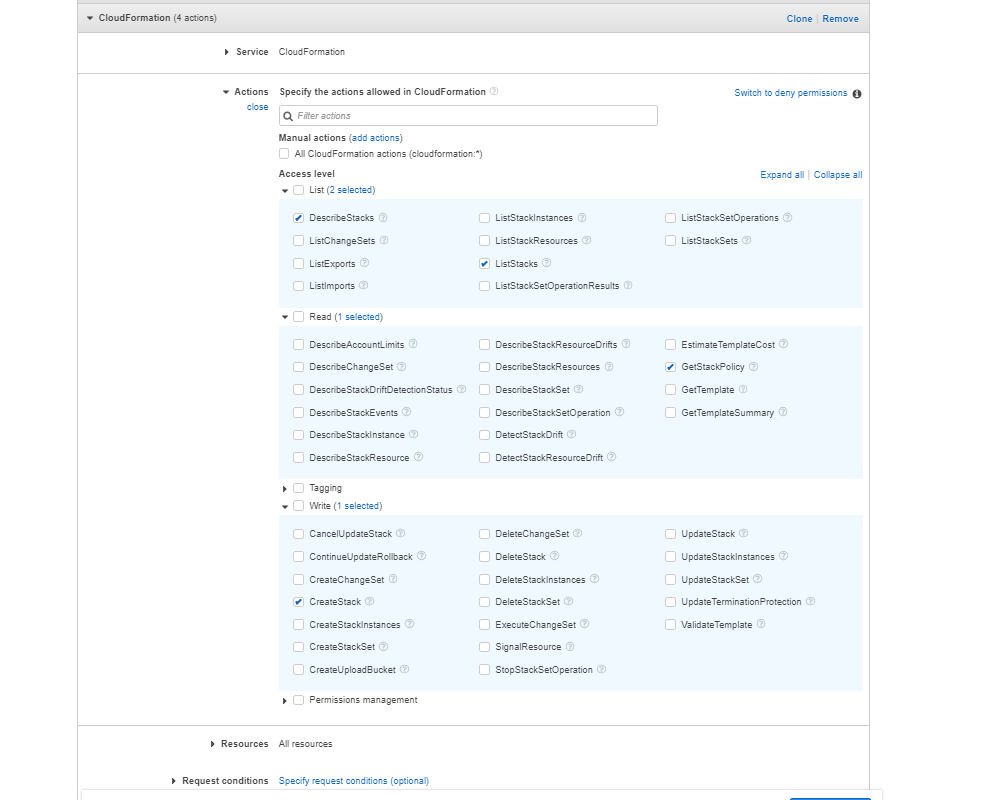
Type “CloudFormation” and tick the minimum necessary permissions needed for our setup: ListStacks, DescribeStacks, GetStackPolicy, CreateStack.
Under Resources tick All resources.
-
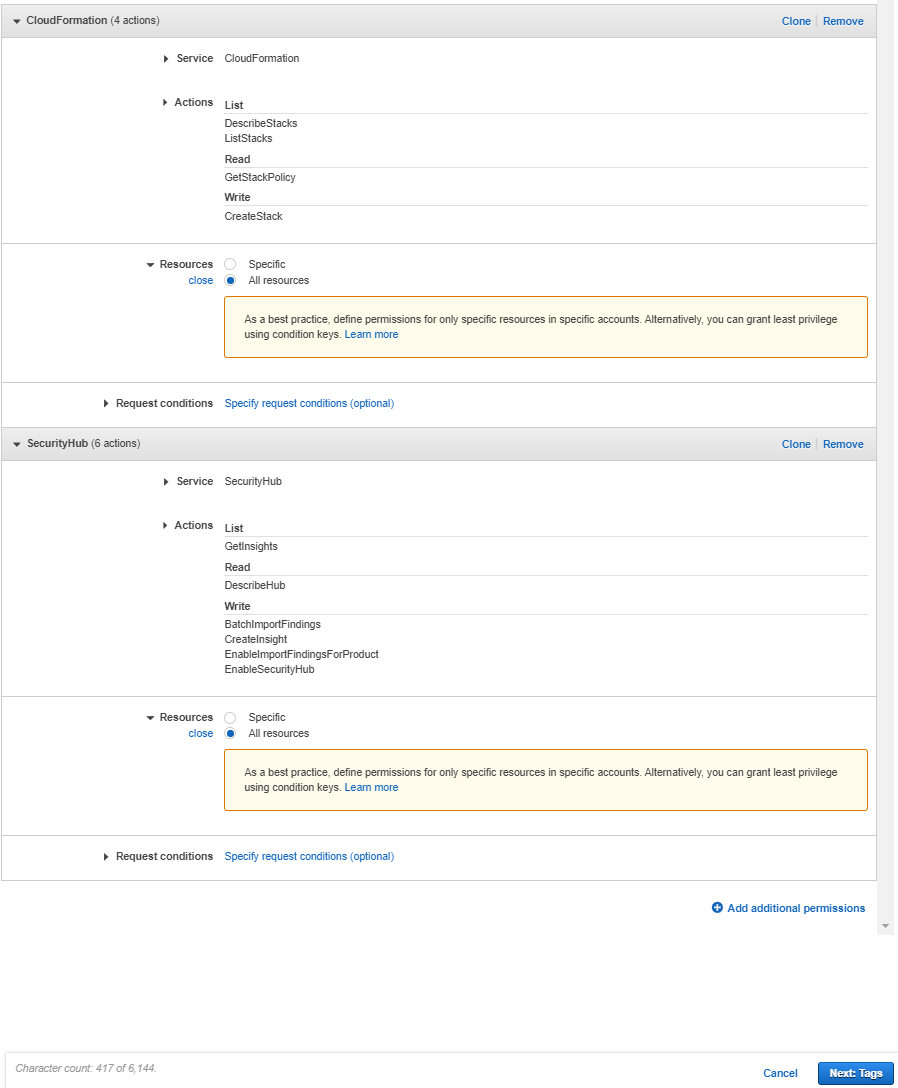
Click Add additional permissions and select Choose a service
-
Type “SecurityHub” and tick: GetInsights, DescribeHub, EnableSecurityHub, BatchImportFindings, CreateInsight, EnableImportFindingsForProduct . Select All resources for Resources.
-
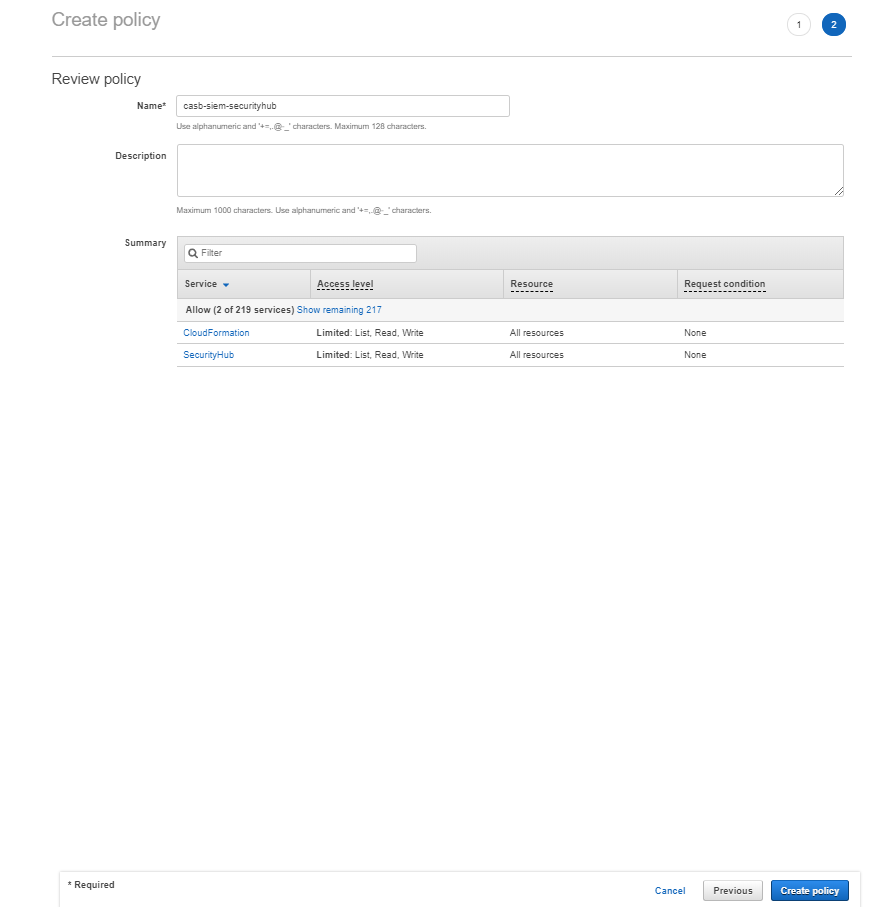
Click Next: Tags. Add a tag or click on Next: Review
-
Type a policy name in the Name field and then click Create policy
-
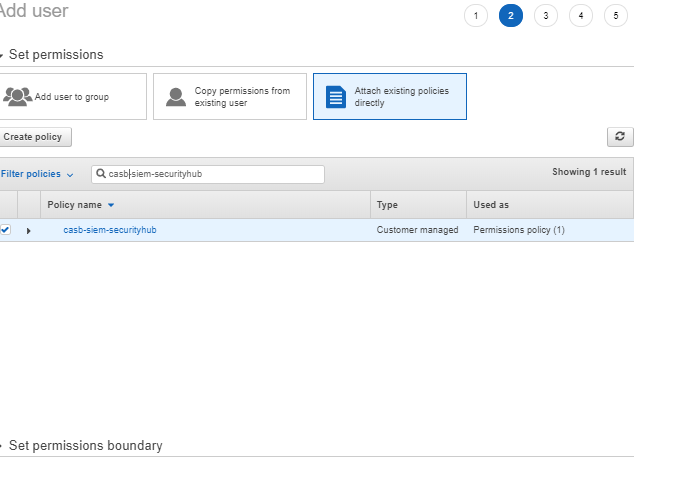
Back on the Add user page, click the refresh icon and type the new policy name
-
Select the policy and click Next
-
Add tags if required in your organization (tags are not required by this integration)
-
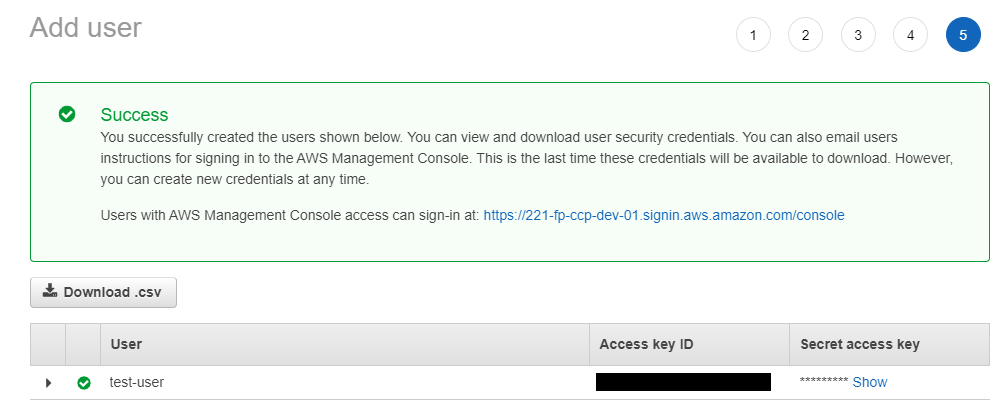
Review the details and then click Create user
-
In the next screen you will be presented with your new user along with your Access key ID and Secret access key, save these or the CSV file in a secure location, this is the only time the Secret access key will be available.
Implementation – Docker
Setup CASB SIEM Logs Importer
The docker implementation described in this chapter requires one preparatory step before the docker container can be run: the creation of a credentials file which is used by CASB SIEM Tool (already installed within the container) to connect securely to CASB.
-
Login into docker repository, you’ll be asked to enter your username and password:
docker login docker.frcpnt.com$ Username: fp-integrations $ Password: t1knmAkn19s -
Replace <casb-username> and <casb-password> in the first two lines with the actual credentials of a CASB user, then run the command below
The command below will create a file called casb-credentials-store in the current directory.
username="<casb-username>"; \ password="<casb-password>"; \ docker run --rm \ --entrypoint /bin/bash \ docker.frcpnt.com/fp-casb-siem-importer -c "cd /usr/SIEM-Tool-Linux-* && \ ./SIEMClient.sh --set.credentials --username \"$username\" --password \"$password\" --credentials.file casb-credentials-store 1>/dev/null; \ cat casb-credentials-store" > ./casb-credentials-store; \ unset username password -
Replace <casb-credentials-store-path> with the path of casb-credentials-store file created in the first step, then run the command below, this will run the container.
Note: the environment variables below can be changed, by default CASB_HOST is set to my.skyfence.com and TRIGGER_PERIOD is set to trigger at every 30 minutes.
docker run --detach \
 --env CASB_HOST='my.skyfence.com' \
 --env TRIGGER_PERIOD='30' \
 --name fp-casb-siem-importer \
 --restart always \
 --volume <casb-credentials-store-path>/casb-credentials-store:/usr/fp-casb-siem-importer/casb-credentials-store \
 --volume FpLogsVolume:/forcepoint-logs \
 docker.frcpnt.com/fp-casb-siem-importer
Setup CASB AWS Security Hub Services - Docker
-
Login into docker repository, you’ll be asked to enter your username and password (provided below):
docker login docker.frcpnt.com$ Username: fp-integrations $ Password: t1knmAkn19s -
Create cfg.json file with all settings as required, more information about the possible values can be found in the Appendix section of this document.
{ "siemPath": "/forcepoint-logs/casb", "firstRunSendHistoricalData": true, "deleteSiemFiles": true, "severityFilterInclude": ["Info", "Low", "Medium", "High", "Critical"], "actionFilterInclude": ["Block", "Monitor"], "productFilterInclude": [ "SaaS Security Gateway", "CASB Incidents", "CASB Admin audit log", "Cloud Service Monitoring" ], "govFlag": false, "awsAccountId": "", "awsAccessKeyId": "", "awsSecretAccessKey": "", "regionName": "" } -
Run the container with either one of the following commands, depending on your scenario
if cfg.json file is located locally then run the following command, replacing <full-path-of-cfg.json> with the full path of the cfg.json file
   docker run --detach \
   --name fp-casb-exporter-aws \
   --restart always \
   --volume <full-path-of-cfg.json>:/usr/fp-casb-exporter-aws/cfg.json \
   --volume FpLogsVolume:/forcepoint-logs \
   docker.frcpnt.com/fp-casb-exporter-aws
if cfg.json file is accessed by a URL, then run the below, replacing <config-file-url> with the URL of the cfg.json file to download
    docker run --detach \
    --env CONFIG_FILE_URL_LOCATION=<config-file-url> \
    --name fp-casb-exporter-aws \
    --restart always \
    --volume FpLogsVolume:/forcepoint-logs \
    docker.frcpnt.com/fp-casb-exporter-aws
Depending on the number of logs exported from CASB, logs matching all filters will be visible after a few minutes into AWS Security Hub.
AWS Security Hub does not store events older than 90 days, so only CASB logs within this timeframe will be processed and sent into AWS Security Hub by our service.
Note: Depending on the TRIGGER_PERIOD picked above, the user should start seeing data in that period, if TRIGGER_PERIOD is not changed, the default is set to trigger at every 30 minutes.
Appendixes
Configuration parameters
The following table provides a description of the parameters in the cfg.json file
| Parameter | Description | Requires to be changed |
|---|---|---|
| siemPath | Path of the directory used by the SIEM Tool to store its output, as defined at step 3.5 | YES |
| firstRunSendHistoricalData | If set to true, process all historical SIEM files in case of CASB SIEM Tool logs present before this setup (leave as true if this is an initial setup) | YES |
| deleteSiemFiles | If set to true, delete SIEM files from their original directory after processing. Should be set to false if the SIEM output is also used by other services. | NO |
| severityFilterInclude | CASB logs where Severity matches any of the values in this array will be exported to AWS. e.g. Leave only ["High", "Critical"] to export only CASB logs with either value in the Severity field. | YES |
| actionFilterInclude | CASB logs where Action matches any of the values in this array will be exported to AWS e.g. Leave only ["Block"] to export only CASB logs with this value in the Action field. | YES |
| productFilterInclude | CASB logs where Product matches any of the values in this array will be exported to AWS. e.g. Leave only ["SaaS Security Gateway", "CASB Incidents"] to export only CASB logs with either value in the Product field. | YES |
| govFlag | Government or commercial integration, set to false by default for commercial | YES |
| awsAccountId | Customer’s AWS account ID | YES |
| awsAccessKeyId | Identifier for the AWS access key | YES |
| awsSecretAccessKey | Secret key for the AWS access key | YES |
| regionName | AWS region name where Security Hub will receive CASB logs e.g. eu-west-2 | YES |
Logs generated by CASB AWS Security Hub Services
The logs generated by CASB AWS Security Hub Services are handled by a log rotate that creates a maximum of 60 MB of logs.
Logs are stored into fp-casb-exporter-aws/logs .
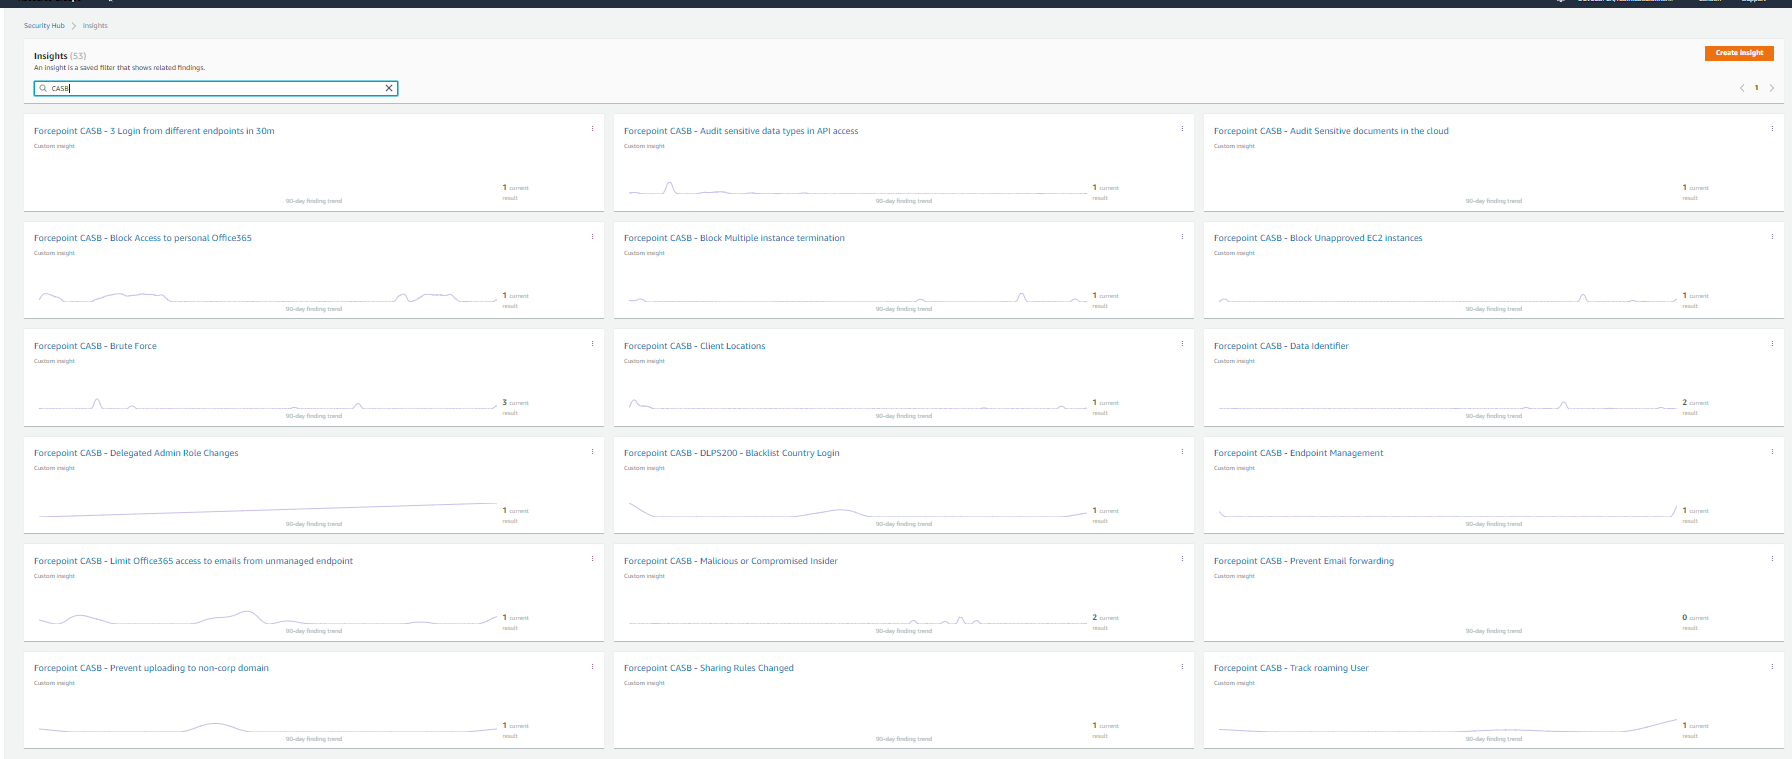
Examples of Insights created into AWS Security Hub
Once the integration is set up, a number of Insights are automatically created inside AWS Security Hub: these can be deleted if not necessary or used as examples to create more specific ones.
Troubleshooting
Follow these steps to identify issues impacting the normal operation of the integration described in this document.
Docker Implementation
Validate the prerequisites
Make sure the prerequisites described in the Summary chapter are all satisfied:
-
Config file cfg.json must be edited with the correct contents (e.g. AWS region name, account id…) as described in the previous chapters of this document
-
User must use a CASB account with admin role for this integration
-
The host machine should have Docker 20.10.5 installed
-
The docker host machine should meet the minimum hardware requirements of 2GB RAM, 50GB free storage and the system needs to be 64-bit
Check all components are configured and running properly
Make sure the products and services involved into this integration are configured as expected and they are running:
-
Check all components are configured and running as expected by running following command
docker ps
and check the result is similar to below
